Homemade vanilla
Welcome to my happy place of DIY, homemade, homegrown, handmade, nourished & crafted, whole hearted living. Finding magic in the mundane & growing some roots in the process.
This post may contain affiliate links. If you click on a link and purchase an item, I will receive a small commission. For more info, please see my disclosure on my Connect page.
Sorry that it’s been a little quiet around here the past month! I’ve been working my fanny off but don’t have much to show for it. Do you ever have times like that?
I rehabbed a fun contemporary dresser for a friend of mine but she didn’t have the hardware so I don’t have a finished pic to show you. She just had a beautiful little baby, so let’s give her a few months to adjust first and then I’ll go over and snap some photos. Besides lots of DIY and cheering at crazy amounts of high school basketball games, I’ve also been working on rechartering for my church scout group. If you’ve ever had to recharter, you feel my pain. With a troop as huge as ours, we’re talking hours and hours that I can never get back, people! I’d love to say that it’s all done but that would be a bold-faced lie. Paperwork is not my favorite, y’all. Not my favorite.
I needed a little break from the scout monotony before I attacked a bunch of scout leaders so I decided to put together some Christmas gifts for a few ladies that I love. Nothing makes me feel better faster than power tools and paint.
I’m so weird.
In my church, the women do something called Visiting Teaching. It’s this cool little thing where you are given a couple women to look out for throughout the year. Your job is to love and care for them not only temporarily but also spiritually. Over the months and years of serving these women, you grow to know and love them. You mourn with them when they hurt, cheer with them when they are glad, feed them when they are sick, and lift them up when life gets too heavy. Visiting Teaching, and the women I have gotten to know through it has been one of the sweetest blessings in my life. It’s not a requirement, but I like to make a little homemade gift for each of them at Christmas. Since the theme for Inspire My Creativity this month is Snowflakes, I used that as my jumping off point in my creative present planning.
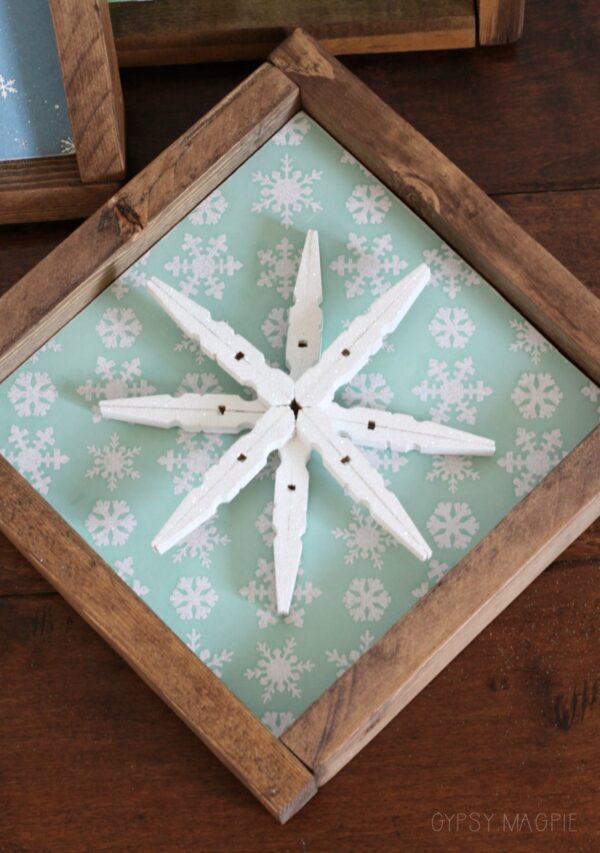
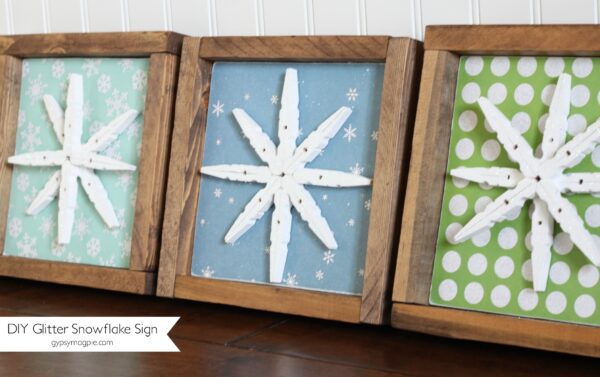
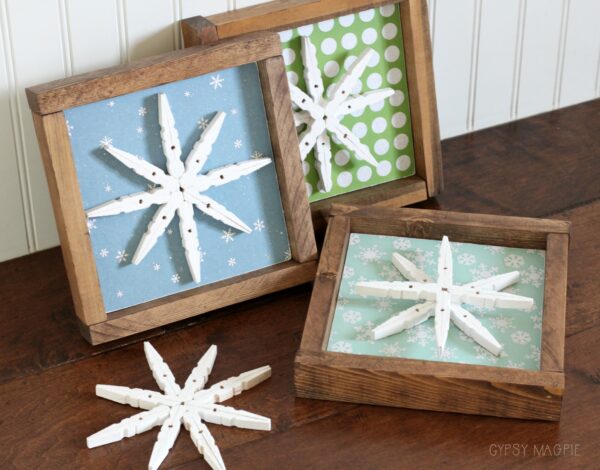
These fun signs are what I came up with.
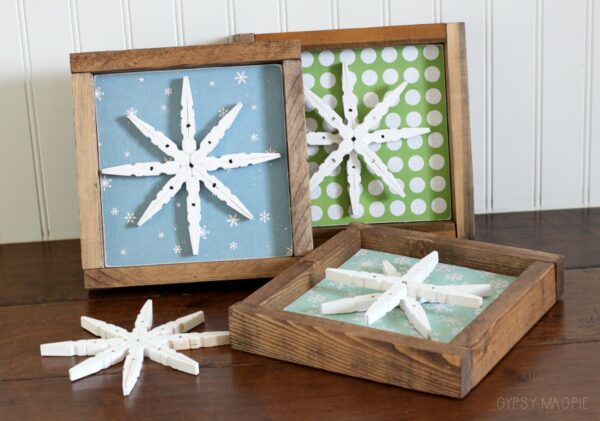
Want to make one?
Here’s how.
This post contains affiliate links which help me keep this creative little happy place going
See my Disclosure page HERE.
Now back to the post…
Supplies:
- Special Walnut Stain
- Extra Fine Glitter in Disco
- Martha Stewart Satin Craft Paint in Wedding Cake
- Mod Podge
- Pine Furring Strip (also known as a 1×2)
- 1×8 Board
- Wooden Clothespins
- Hot Glue & Glue Gun
- Scrapbook Paper
- Saw
- Tape Measure
- Sanding Block
- Hammer & Nails or Brad Nailer
Build a Sign
I made my project in wonky order, so do what I say not what I do. Mmmkay?
The first thing you’ll want to do is cut your wood to make the sign. I didn’t take a bunch of process pics, because I’m a bad blogger, but I think you’ll get the general idea. I cut my 1×8 piece down to 7″ to create the back of my sign. Then, using the furring strip, I cut my two side pieces to fit the length of the back piece. Once those are cut, simply measure the width and cut the top and bottom pieces to fit. (So, the top and bottom pieces will be longer than the side pieces.)
This pic will give you a better idea of how you’ll cut your frame pieces and how those pieces fit.
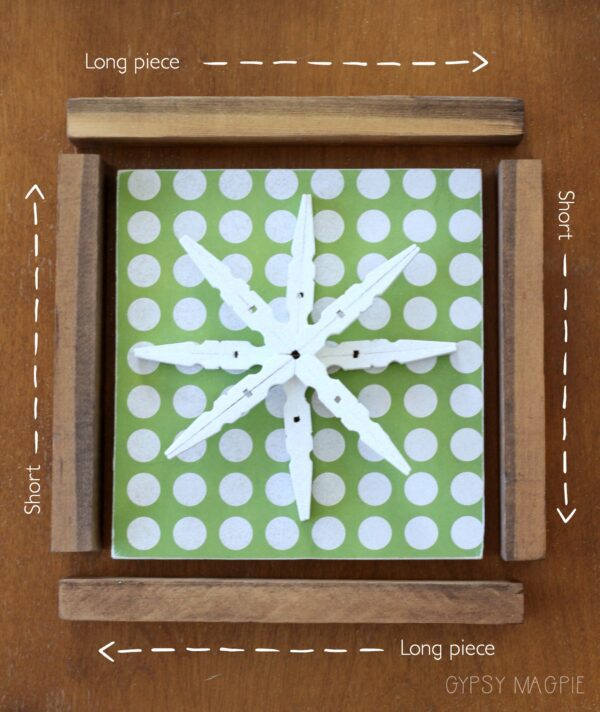
After everything is cut, give it all a good sanding.
The next step is staining the frame pieces. I like to stain/paint before putting signs together. It helps keep things clean and is so much easier than trying to do it after the sign is built. That, my friends, is frustrating. Stain the frame pieces and set aside to dry.
Now paint the back piece white. You could really skip this step if you want to, but I like the white paint peeking through on the edges. It’s totally personal preference though. Once the paint is dry, mod podge on the paper. I went with some fun Christmas and winter-esque paper but use whatever makes you happy. I had originally planned to use some old sheet music but somehow it ended up in Seattle. Long story. You could customize these little signs to your heart’s content. Striped paper, polka dots, a vintage snow scene, a paint by number, yellowed newspaper, or leave the paper off and paint the back. Make it your own.
Quick tip for mod podge: brush a thin layer of mod podge on the wood backing. another thin layer on the back of your paper and then press together. Use a bone folder, scraper, or even a credit card to smooth the bubbles out. I’ve found this method gets me the best results. Oh, and if you are wondering, I didn’t mod podge the front of my paper because I was going for a clean look but you can if you want.
After the mod podge and paper are dry, go around the edges with a sanding block. This wears down the new-ness and gives it a worn look. Unless you don’t want to and then do that. Whatevs. I’m not your mom. Set the wood aside, it’s time to get your glitter on.
Make a Snowflake
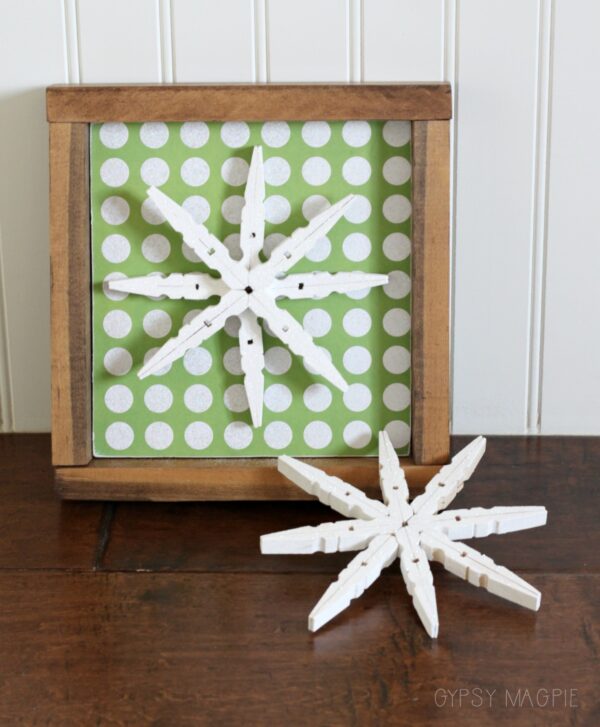
Pull apart the clothespins, taking the metal spring piece off. You’ll need about 8 clothespins per snowflake. Hot glue the flat sides of each clothespin together. This will make one leg of your snowflake. Once you have 8 glued pieces, you’ll create your snowflake shape and glue that together. There are several ways you can create your snowflake. Here are two ways I like to do them, the first is flat and the second layered flake is a bit more dimensional.
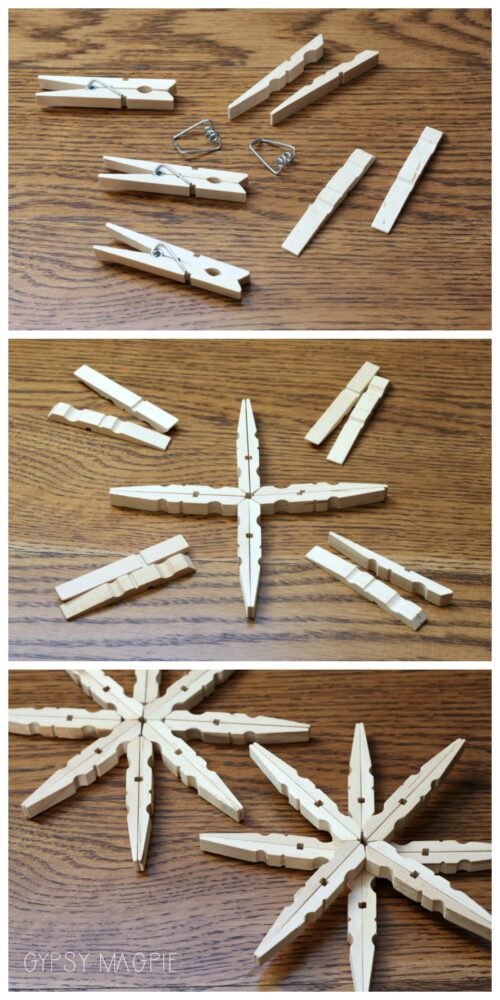
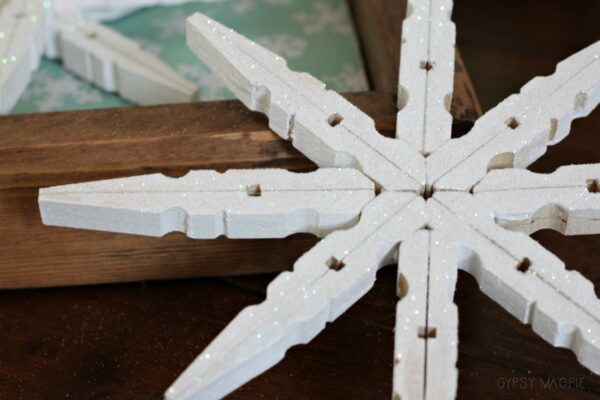
Once you’ve got your snowflake put together, you get to decorate it. I chose to paint mine white and then add some glam with glitter. If you want to make one like mine, you’ll paint your snowflake, let it dry, then paint on a thin layer of mod podge and sprinkle with the glitter of your choice. Once it’s good and dry, you’ve got the cutest clothespin snowflake I ever did see.
By the way, did you know it’s crazy hard to take pictures of glitter?
Well, it totally is. I thought I was coming a long way on my photography until I tried taking pics of these glitter snowflakes. Now I kinda want to cry. You can’t really tell from the photos but I promise the snowflakes are so sparkly and fun in real life. *sigh*

Glue your hard to photograph, sparkly snowflake to the papered wood back, nail on the frame, add a sawtooth hanger to the backside, and you’re done!
Quick tip for nailing on the frame:
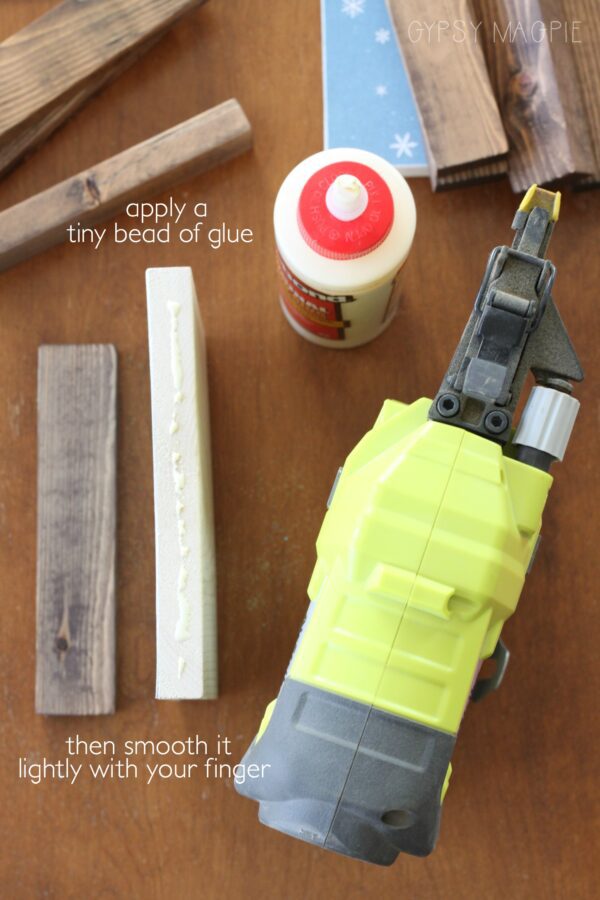
Apply a thin bead of glue along the side of the sign back. Thin. Tiny. SMALL. Then lightly smooth and spread the glue with your finger. Don’t be tempted to use a bunch of glue. You’ll end up with glue drips and sags all over, plus a frowny face. Nobody likes that. Once you’ve got the glue on, nail the two side pieces first and then the top and bottom pieces. You don’t have to use a brad nailer, but man does it make the process go fast. Still my favorite tool, hands down. If you don’t have one use a hammer and some finish nails.
Ok, cliff notes… a thin bead of glue, smooth, nail sides on first, then top and bottom. Yay. You’re done.
Glitter Snowflake Ideas
This sign is absolutely darling, but if the idea of building signs has your brain exploding you can totally make the glitter snowflake alone.
These little glittery clothespin snowflakes make darling ornaments, teacher gifts, and present toppers! Usually, our Christmases here in my mountain valley are white but we’re having a crazy dry spell. It just doesn’t feel like the holidays without snow! I keep thinking how cute it would be to make a bunch of these and hang them with string in my dining room window.
Maybe they’ll inspire Jack Frost to get off his lazy butt!
I guess a white Christmas loving girl can only hope!

For more great snowflake inspired fun, check out this month’s
Inspire My Creativity Link Party and all the fabulous ladies below!
Love your snowflakes! They’re so cute!
These are adorable, you are so creative!!!
These are so darling! I love that you used clothespins! What a fun project.