Homemade vanilla
Welcome to my happy place of DIY, homemade, homegrown, handmade, nourished & crafted, whole hearted living. Finding magic in the mundane & growing some roots in the process.
This post may contain affiliate links. If you click on a link and purchase an item, I will receive a small commission. For more info, please see my disclosure on my Connect page.
I spent this past Saturday working on an Kingsbury Cabinet Grand antique piano.
A sweet friend of mine, who is battling cancer, called a while back and asked if I would be willing to make a dream come true for her. She wants to get her hand-me-down piano out of the garage and into her home so she can hear her kids play. This fantastic woman is smack in the middle of chemo treatments and is mostly house bound in an effort to keep her immune system safe and treatment ready. I’ve never done a piano before, but jumped at the chance to work on this one. How could I not? This friend has done so much for those around her. She is a light and a lifter. If she wants music, there will be music as far as I am concerned.
*This post contains affiliate links which helps me keep this creative little happy place going*
See my Disclosure page HERE.
Now back to the post…
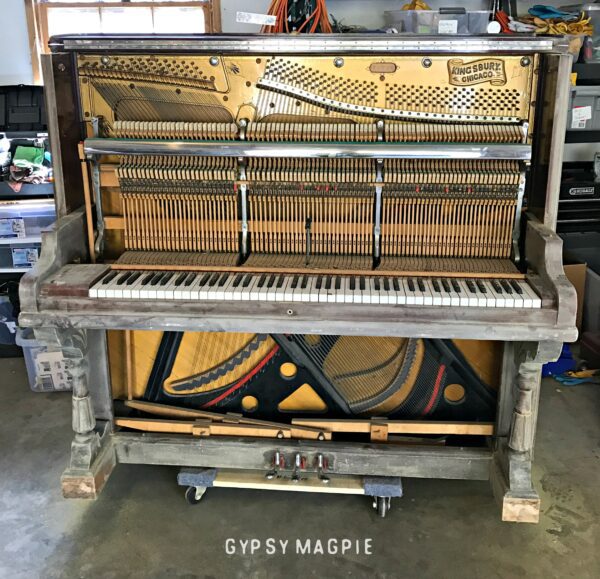
Antique Piano Before
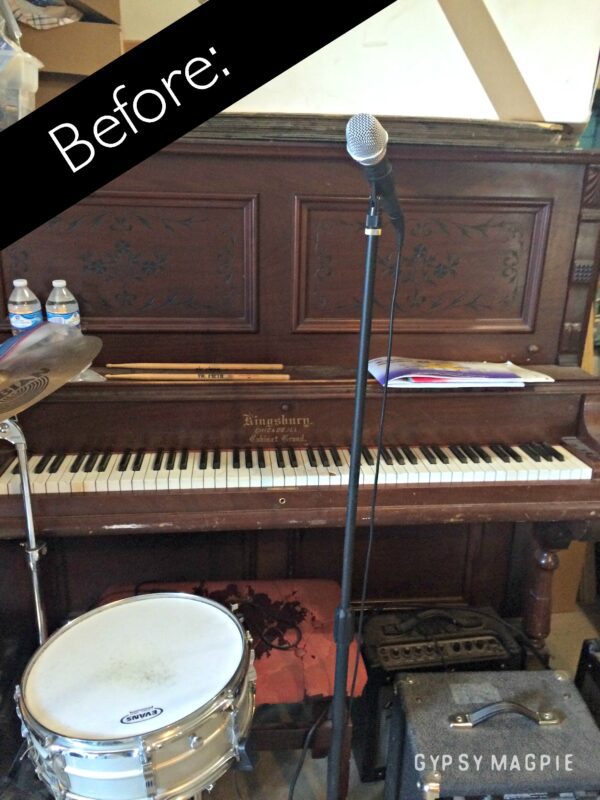
This family loves music and it makes my heart happy.
They need a working piano, and it’ll sure help if it’s a little more pretty and a whole lot less dangerous!
From what I was able to find on the internet, this cool old lady is from around 1910 making her over 100 years old.
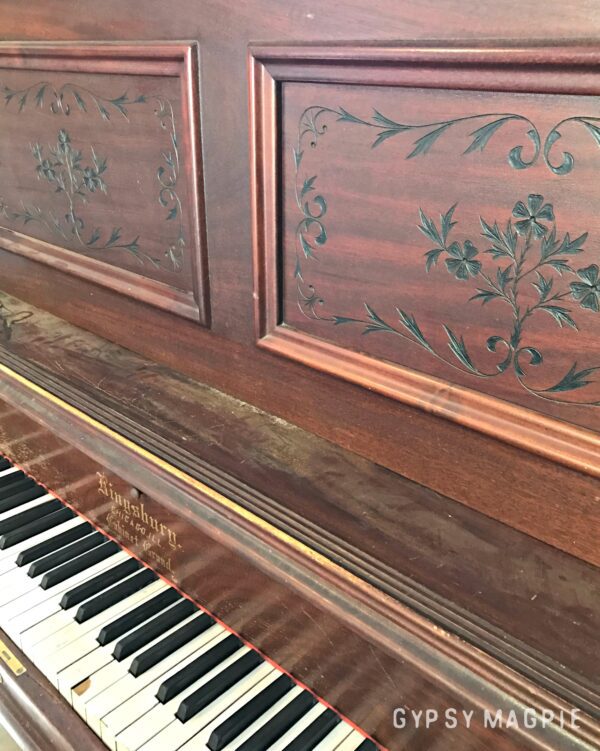
Those carvings make me swoon.
I hope I can do them justice.
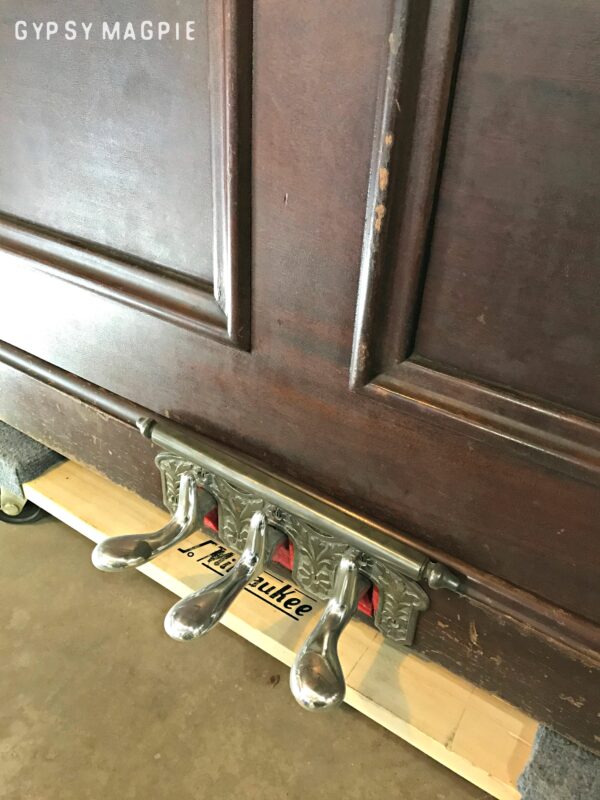
And, just take a look at these gorgeous pedals!
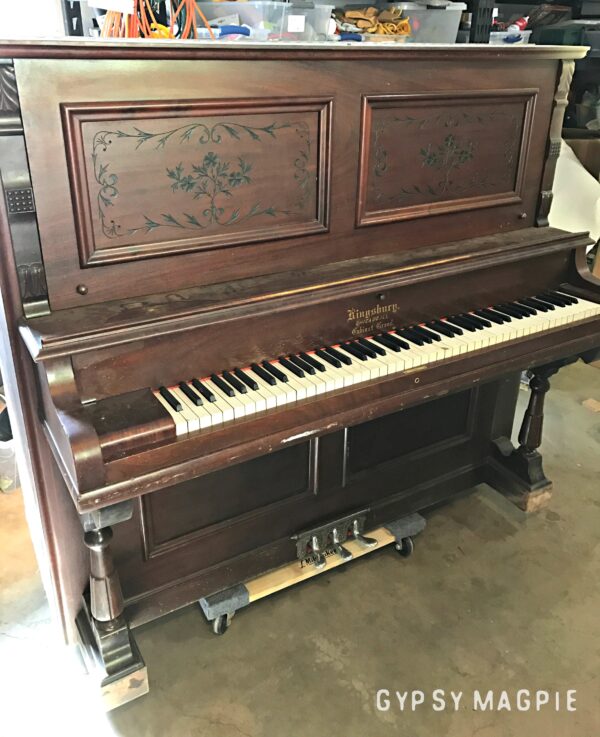
Here’s What I’ve Done So Far
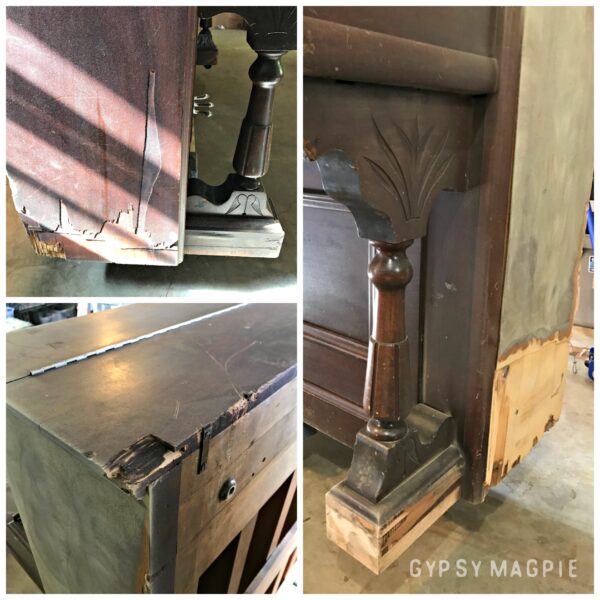
I started by assessing the damage.
The front of the piano has stayed pretty well intact. There was a little veneer damage on the legs but that was easy to deal with. The left leg is a tiny bit wobbly. I tried to tighten the screws but that didn’t help, so I glued all the seams. If it’s still moving when I go back, I’ll have to drill another screw in somewhere to make it secure.
Veneer
At first when I started on the sides, I thought that I could glue down the flapping veneer and then patch over it to make it level. Unfortunately, the veneer was incredibly brittle so the more I tried, the more pieces broke off. I started pulling and sanding until I found sections that weren’t coming off no matter what I did. I then scored the veneer with a knife and pulled off the broken sections.
As I was pulling off the veneer, the wood underneath started splintering and pulling the front pieces of veneer. I didn’t want to crack or damage the front of the piano at all so I stopped there and turned to sanding. The ideal would be to pull off all the veneer on the sides, but that wasn’t going to happen. Win some/lose some. It will still be flat and pretty, it just requires more work.
Sand & Fill
After I got the veneer stable, I did a TON of sanding and filling.
I spent 2 hours, went through 2 pieces of sand paper on my palm sander, and 3 sanding blocks working on the old broken veneer. Lastly, I started filling holes.
To say I used a lot of filler would be an understatement!
In Utah, tons of people DIY their own furniture. I guess it’s fair to say we are a frugal culture and are pretty creative. People see a piece at a market and think “I can totally do that for SO much cheaper!” Oh, come on. Admit it! I catch myself doing it to. Where I see DIYer’s running into trouble is when they grab their project, hit it with a can of spray paint or some leftover latex, and call it done. They usually end up frustrated down the road because their piece falls apart, the paint peels, or it just looks all around shabby and not in the chic way.
I don’t think the majority of peeps fully understand the magnitude of prep work. You can slap that thing with the most expensive paint in the world and it’s still not going to be beautiful if you haven’t put in the time behind the scenes. I spent over 4 hours Saturday and I still have work to do, you guys.
Hmmm, maybe I need to write a prep work post?
I’ll have to give that idea a little more thought.
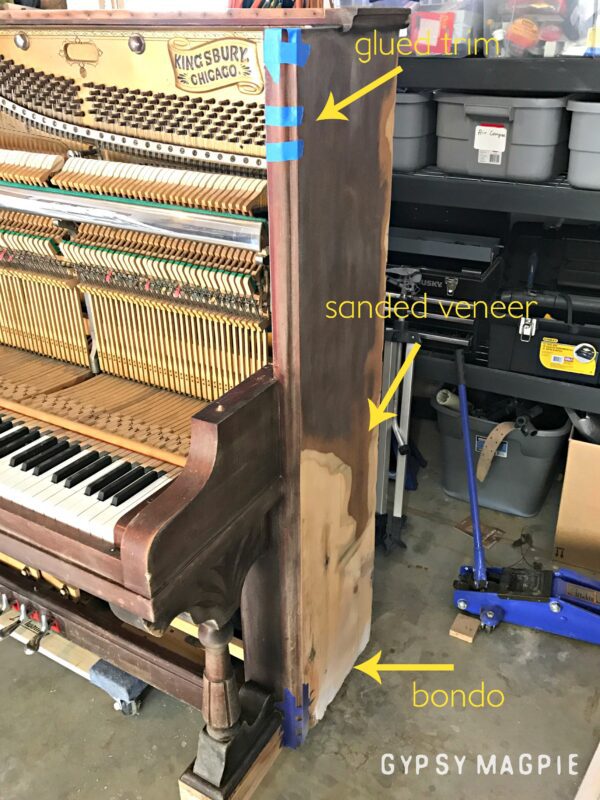
Bondo
I use Bondo all the time for filling big stuff on projects that I will be painting. It’s fairly easy to use and sandable, which allows me to create the illusion that the giant gaping hole that your kids made while playing roller hockey in the house while you were at the movies NEVER happened.
It’s like magic.
If only they made this stuff for my 30-something face.
A girl can dream, right?
This piano had large chunks of wood missing from both sides, so I’m building up layers of filler until the sides are sleek and level. I’m not filling all the little chips and chunks on the piece. This gal is over 100 years old! I don’t want to take away her character, but I do want to make her safe. No more chipping veneer, splinters, and sharp edges.
To Do
- Sand removable pieces
- Wipe down to prep for paint
- Repair wobbly leg
- Finish filling sides of piano
- Sand over filler to smooth
- Wipe down to prep for paint
- Shellac
- Paint
- Sand
- Apply finish
- Buff
- Put piano back together
Oh man, that list makes this feel a little daunting doesn’t it?
My goal is to have it completely prepped by Wednesday so I can have a clear brain to enjoy Fall Break with my kids.
Cross your fingers for me!
What questions do you have about prepping a piece?
Update: You have got to see the AFTER!
Save
Save