Homemade vanilla
Welcome to my happy place of DIY, homemade, homegrown, handmade, nourished & crafted, whole hearted living. Finding magic in the mundane & growing some roots in the process.
This post may contain affiliate links. If you click on a link and purchase an item, I will receive a small commission. For more info, please see my disclosure on my Connect page.
I have this horrible habit of doing projects, taking pics throughout the process, and then never posting about them. Something always seems to come up and then pics, like the ones of this greywashed pedestal table included below, just sit on my computer. Or worse yet, I forget to even take pictures! I finished the happiest red piano a couple weeks ago but do you think I remembered to capture any after photos? Nope! *smacks forehead* I am furious with myself! That beast was a ton of work and I walked away without taking a picture. Can we say “Squirrel”?
I have issues.
This post contains affiliate links which helps me keep this creative little happy place going*
See my Disclosure page HERE.
Now back to the post…
This morning I found some old pics of a pair of tables that I worked on a couple years ago and thought to myself, why not? Better late than never, right? My photography skills have hopefully improved in the two years since I worked on these but I’m not going to not post them just because they aren’t captured perfectly. These little side tables are too pretty not to share.
Hold on, I’m getting ahead of myself.
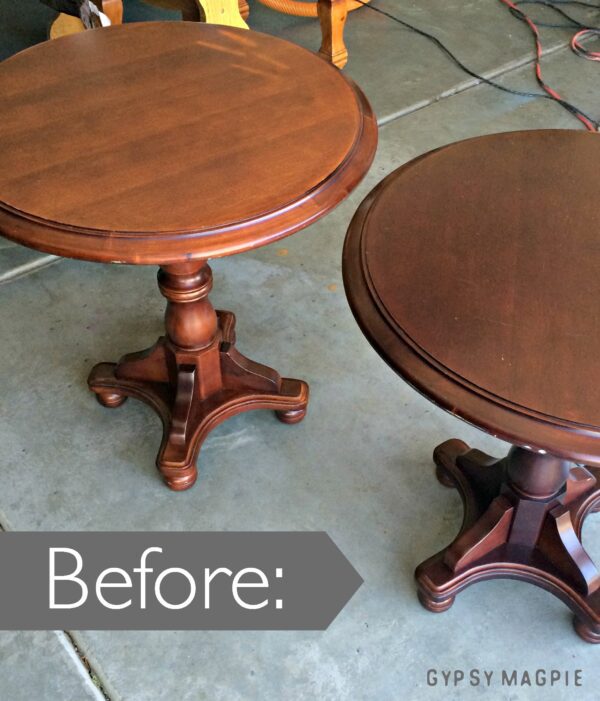
Let me show you the before pics for dramatic emphasis.

Ok, not really all that dramatic.
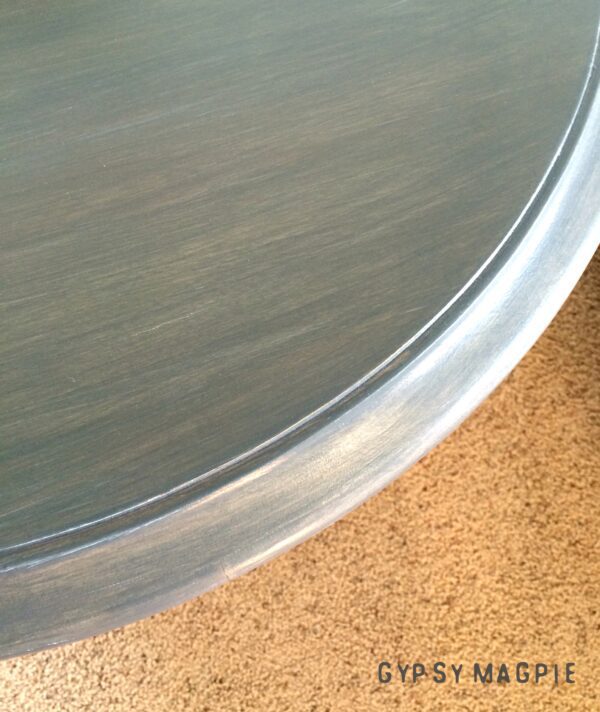
The were actually in pretty decent shape other than some dings, chips, and a bit of heat damage to the tops. I tightened the nuts and bolts to make them sturdy, gave them a good wash down, then hit them with some sand paper. Once everything was prepped, I treated the table tops with a coat of wood conditioner to keep the stain from going blotchy. After the conditioner, I used several layers of different stain then dry brushed over the top with white paint to get a greywashed or weathered wood look. Finally, I coated the whole top with General Finishes High Performance Top Coat.

In the 2 years since I finished these tables I have found several stains that I like MUCH better than the deck stain that I used for the base color on these table tops. Some stains you might like are Weathered Grey, Driftwood, and Sunbleached. They are all fun colors to play with. If you are looking for a cool feeling basic grey, then Classic Grey is definitely up your alley and one I use all the time. If stain scares you, you can also create a similar look using layers of paint. Start by going over the whole surface with your base color then dry brushing layers of paint from there.
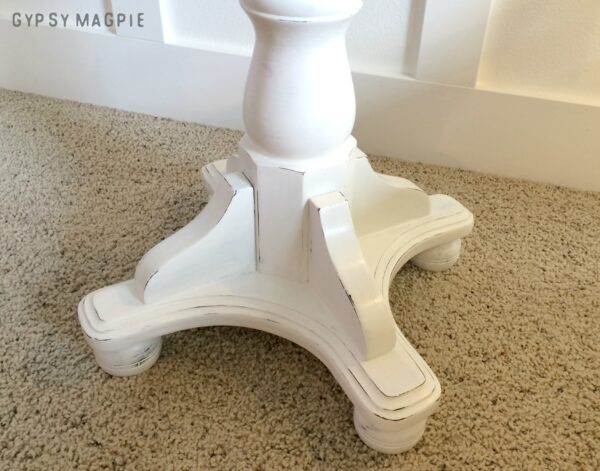
For the pedestal bases, I used Annie Sloan Pure White and Clear Wax.
That stuff gives the prettiest farmhouse finish!

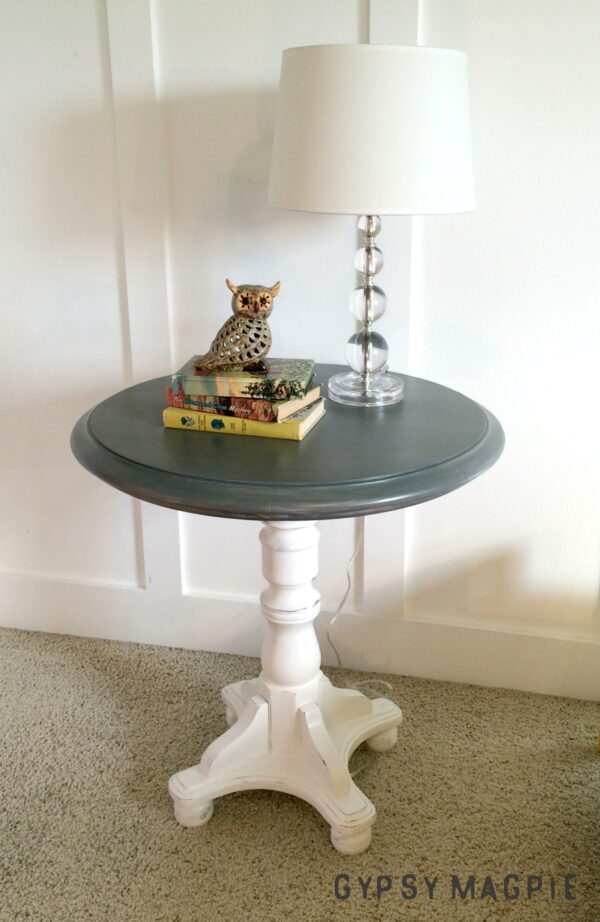
Ready to see the after?
Yeah, I’ve drug this out long enough.
Classy Farmhouse.

I was really happy with how this greywashed pedestal table and her twin turned out. They went to live with a childhood friend of mine who bought them for his wife for Christmas. How cute is that? Good man! I hope she liked them as much as I did.
Thanks for ignoring my wonky photos.
I recently started a photography class from Ashley of Under the Sycamore and now all I can see is all the stuff I did wrong! But, I guess that means I’m learning, right? Yay! Her photography courses are all about learning how to use your camera so you can capture your days, moments, and loved ones.
You can find her classes HERE if you are interested. So far, they have been awesome and I have been very pleased. Hopefully my photography skills can increase along with my memory. Maybe then I can start sharing some of the good stuff that goes on around here without chasing too many squirrels.
Well, a girl can hope!
What is the most annoying thing
that you constantly forget?
Save
Save
Save