Homemade vanilla
Welcome to my happy place of DIY, homemade, homegrown, handmade, nourished & crafted, whole hearted living. Finding magic in the mundane & growing some roots in the process.
This post may contain affiliate links. If you click on a link and purchase an item, I will receive a small commission. For more info, please see my disclosure on my Connect page.
I had a blast playing with Winter White Glaze Effects by General Finishes on my Antique Cabinet the other day. While I was working on the piece, I shared a video of how I apply the glaze on my Insta-stories. Like an idiot, I didn’t save that story. Oopsies. I’ll never learn! In case you missed the vid or had questions, I thought I’d write up a quick post with my best tips & tricks for applying glaze.
Next time I glaze a piece, I’ll make another video and do a whole step by step, in-depth feast but for now I offer you a snack.
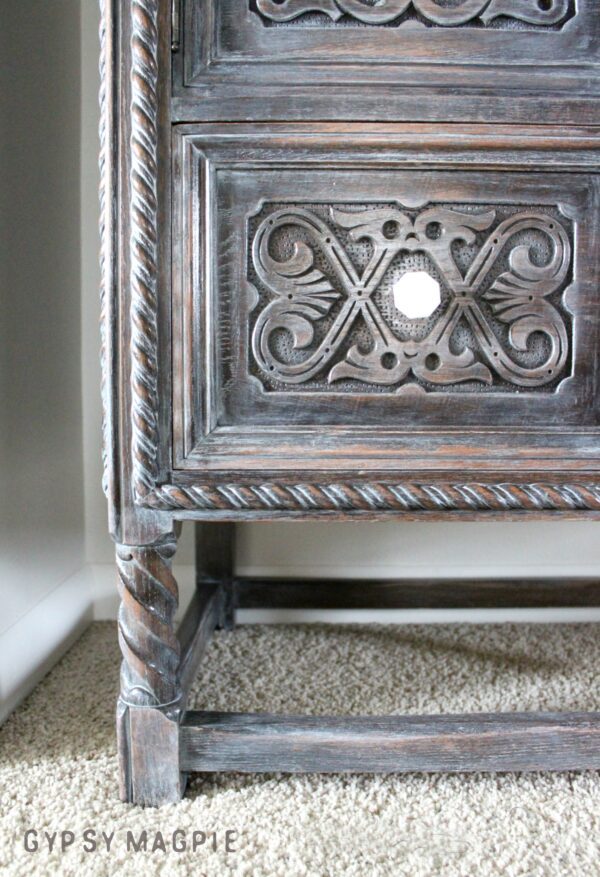
Glaze
I think applying glaze can be intimidating to a lot of furniture newbies, and I totally get it!
There is definitely a learning curve. I have some dining chairs I smothered in brown glaze about 8 years ago, and they make me laugh when I look at them. I was WAY too heavy handed and was obviously just winging it! The look old and dirty, which wasn’t the exact look I was going for! Just like most things, proficiency comes with trial and error. You’ve got to really get into it and play with a product or technique before it’s going to look the way you want. It’s a learning process. You’re probably going to step back from your first couple tries and want to burn it to the ground. That’s normal, y’all. Totally normal. Don’t give up! Evaluate what went right and what went wrong, then move forward from there.
*If you’ve never applied glaze before, I’d suggest first trying it out on a sample board, old cabinet door, or piece of furniture you don’t give a hoot about. If you hate it, paint over and try again until you get in your groove. When you feel like you’ve finally got the hang of things, then move on to Aunt Eileen’s prized buffet. Practice, practice, practice… just like your grumpy old piano teacher always said. I’m not kidding, you’ll be beyond glad that you did.
This post contains affiliate links which help me keep this creative little happy place going
See my Disclosure page HERE.
Now back to the post…
Supplies:
Tips & Tricks:
- Seal with Shellac or a top coat BEFORE applying glaze. This keeps the glaze from muddying your paint. You don’t want the glaze to infiltrate the paint, you want it to skim across the surface and rest in the cracks. I know this feels like an extra step, but it is crucial!
- There are several ways you can apply glaze. When you are practicing, try applying with a paintbrush, sponge brush, and a rag so you can figure out what you find most comfortable. For my cabinet, I used a bristled paintbrush to apply the glaze. The bristles help get the product into all the cracks, nooks, and crannies. A paintbrush also gives movement and brush strokes that create texture for the eye. This is especially helpful when creating a weathered finish like I did on that antique cabinet. You can dry brush on glaze if you are wanting even more brush strokes.
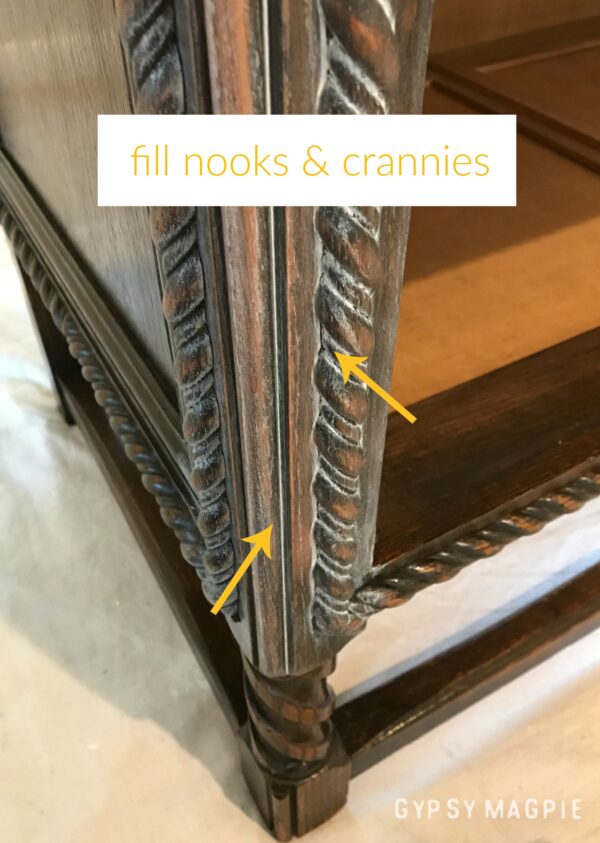
- Work in small sections! Brush or wipe on, then immediately wipe off. Make sure that your final swipes go with the grain of the wood. You don’t want to get swirly circles in your glaze. Keep in mind that the glaze is there to age your piece and highlight the curves and details NOT to draw away attention. Don’t swim your piece in glaze, it rarely looks professional or pretty… especially if you are using a dark colored glaze. We’ve all seen the DIY projects that were murdered by glaze happy hands. Sad face.
- Speaking of not swimming, go easy at first. Use a light hand and wipe, wipe, wipe! You can always go back over and add more glaze later if it’s not dark enough for you. I have a feel for how I like my glaze, I sort of alternate between dry and damp rags to get my look. I’m not sure how to explain it other than it just takes practice. Know that the damp rag will take off a lot more of the glaze than the dry rag will. If it wipes off more than you were hoping, don’t freak out! Just go back and reapply after it dries a bit. You have complete control of where the color goes and how much you want. That’s the cool thing about using glaze!
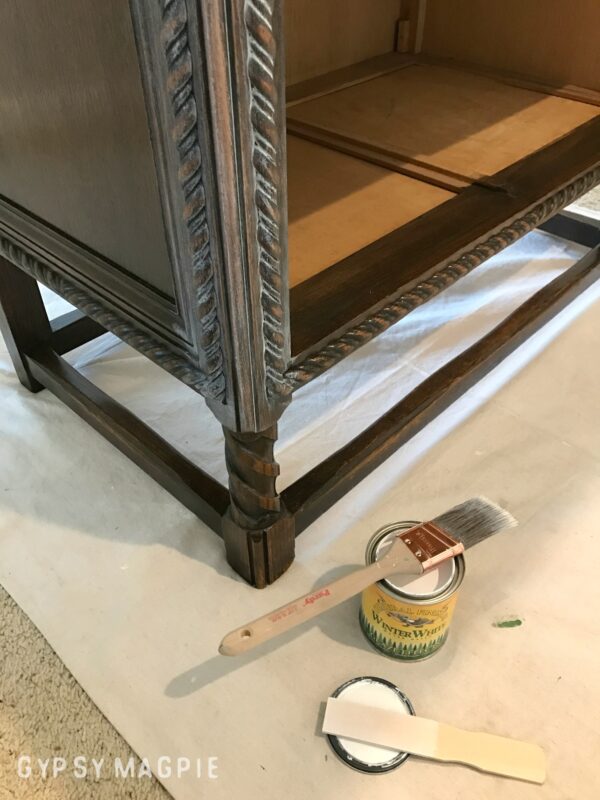
- I have tried a lot of different glazes but I always go back to General Finishes. They have a great range of colors, are water-based, and have a longer open time. A “longer open time” means you have more time to work the product around before it dries which means less chance of that oopsie being permanent. Yay! Oh, and water-based = easy soap and water clean up. I’m all for that! *I feel like I should say here, that this post is not sponsored by General Finishes, I just genuinely love their products. Plus, they have fantastic customer service and that is something I look for in companies I buy from.
- You can thin glaze for a lighter look. If the glaze is oil based, thin with mineral spirits. If it is water based, thin with a bit of water. To do this, pour some glaze into a container and add 10-20% thinner (the mineral spirits or the water as mentioned above). Stir well with a paint stick and you are good to go.
- Applying glaze will deepen your paint color, so be prepared for that. Depending on the color of glaze you use, your paint color will feel richer. Using white glaze or a pearl glaze will lighten and soften your underlying paint color. The color of glaze you go with can completely change the feeling. A dark glaze will add drama and depth. A light glaze will add a light, airy feeling.
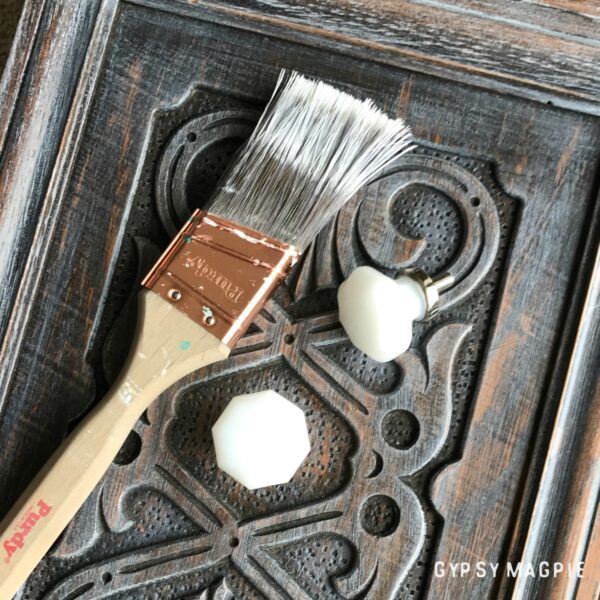
- Glaze works best on pieces with detail. You can use it on plain furniture, but it doesn’t give the same effect as it does on a piece with curves, carving, and movement. If you are going for a clean, modern vibe, glaze probably isn’t going to give you the look you are after.
- If you are using a water-based glaze over an oil based stain, make sure to give the stain a couple days to dry thoroughly before glazing.
- Glaze isn’t a durable finish, so you’ll need to follow up with a top coat to seal it. Allow the glaze to dry then seal your piece.
Questions?
I know this isn’t an in-depth how to, but hopefully, I’ve answered some questions and given you a little more confidence to try out this type of product. Glaze is really fun to play with and can give a piece such a cool vibe.
If you have any other questions, feel free to drop me a line in the comment section below and I’ll walk you through!
I’ve never used glaze before (or painted furniture for that mater) – can you use glaze over wood furniture that has original stain/varnish?
Hi Jill! Yes, you can apply a glaze over original stain/varnish. If you’ve never applied it before, I’d practice on an old cabinet door or something else first so you can get the hang of it before you tackle your piece.
yes you certainly can use glaze overwood furniture that already has harness for original stain but keep in mind to clean it exceptionally well you don’t want your glaze to be blotchy if you have dirt on that wood that needs to be cleaned pretty well before you apply your glaze!! also rinsing is important don’t leave any type of foreign liquid which would be any type of chemical it will also cause problems with your glaze so make sure you’re pieces very clean very dry and dust free that will create a much much happier finish for you if that makes sense. Good luck I love DIY people it’s the only way to go..
I have a question……..what sort of paint do you use before the glazing? Latex? chalk?, etc…….If chalk paint, would you sand it before you apply the glaze or not sand at all? I’m thinking that latex paints are best……and what finish? flat, satin, etc…..? thanks, ph
Hi Paula, let me see if I can answer these questions for you. Question 1: I use paints specifically formulated for use on furniture. I use chalk paint, milk paint, mineral, ceramic, acrylic (such as General Finishes), and alkyd (such as Benjamin Moore Advance or Sherwin Williams ProClassic). Other than making my own chalk paint using flat latex, I do not use latex paint on furniture. 2: If you are using chalk paint you will want to sand it and distress before you glazed. Here’s the process after you’ve painted- sand and distress to your liking, wipe it down, apply a layer of top coat, let dry, apply your glaze and wipe off to your liking, let dry, and then finish it off with another layer of top coat to seal it in. Hope that helps! Thanks for stopping by!
Quick question for you. I am about ready to glaze my bathroom vanity cupboards, chalk paint base. Can I clear wax and then glaze or do I need a topcoat as you mention rather than wax. Thanks, hope you read this – never glazed over wax before but love the finish it gives.
Hey there! If you are using a glaze, you’ll need to top coat first. If you are wanting to wax, I’d skip the glaze and use a colored wax instead. You’ll put on a layer of clear wax and buff it in, then use a dark, black, or white wax over that in the corners and areas you were wanting to glaze. It’ll give you the same effect. Good luck on your project!
I love gf products as well. Especially the milk pain and glaze. I found using gf extendor makes a huge difference on the open time. No more sticky glaze before I can get it off! It makes the glaze so much more forgiving!
Hello. Do you think i can use glaze to create wood grain by using the specific tool?
That’s an interesting question, Christi. I’ve never done it myself but I have seen where other people have. You’ll need a rocking tool or a wood grain roller. I think the roller might be easiest to practice with. If you do it, I’d love to hear how it goes for you!
Newly here! I painted a piece, not a curvy one. Flat, the have been trying to glaze on top. Looks like you say to 1st. Put a coat of clear shellac BEFORE I glaze. Is that right?
Hi Marcia,
I like to put a coat of clear shellac or other poly top coat on first. This helps the glaze slide across the surface and keeps it from going muddy. I don’t like heavy glaze, I prefer it as an accent.
I glazed without properly testing and hate the result. I used valspar mixing glaze over latex paint. The paint color I mixed with the glaze did not give the desired effect. I’m a newbie so decided to see what it looked like dry. Still hate it. Can I paint over this now or have I ruined it forever? Thank you.
I’m sorry you had a bad experience! I’ve never used valspar mixing glaze, so I don’t have any tips to offer there. If you hate it, yes, you can absolutely paint over. That’s the wonderful thing about paint. Good luck!
I’m in the process of priming an Armoire and my plan is to use a white satin paint and a smoky glaze to finish it off. My concern is the top coat. Which would you suggest using over a white base? I’ve heard it can start yellowing over time and that would be HORRIBLE. Wonderful tutorial by the way!
Hi Brittany! That is a good question and I’m afraid I don’t have a perfect answer. Unfortunately, all white paint will yellow over time at least to some degree. It’s just the nature of paint. General Finishes is working on a white paint/poly combination that is supposed to resist yellowing, but from what I’ve read it is still a few months out. My suggestion is to use high-quality paint and topcoat. In my experience, the cheap it is the faster it yellows. When I’m doing plain white pieces, I like to mix a little white paint into the topcoat on my first layer. I let that dry and then do my additional layers of clear. I’ve found that to help the yellowing, but I don’t know how that would affect your smoky glaze. Wish I had a better answer for you!!
Thank you for your website! My question is I am trying to glaze an open shelf unit and getting the glaze to look right in all the 90 degree angles of walls and shelves seems impossible. All these inside corners come out blotchy or no glaze at all after trying to wipe it to the edge. Any tips?
Hey there! Sorry to get back to you so late! I lost this comment in spam. This is a tough one. Angles, trim, and connecting parts can be difficult. When I’m working on frustrating parts like that, I like to use a clean, sharp, angled brush with a very light hand. Put the brush into the angle and then pull outward in the first angle, put the brush back in the angle and pull outward the opposite angle. Dang! I wish I could show you with my hands! Haha! Also, I find it’s easier to start light and build up rather than going heavy and then trying to take away. I hope that helps. Best of luck on your shelves!
Cutest idea ever! I am a big fan of your project and I love to try out this soon for my furniture as well. It would be a great experience like you. Thanks a lot for sharing this with us.
Love it! How you get the blue color? Please i need all the steep , it really love me
It’s actually white, not blue. Sorry! But if you are wanting a blue look, you could water down some blue paint and use it like a wash.
Can you please tell me if the glaze people use on ceramics the same as furniture glaze?
I have the opportunity to buy a huge lot of glaze but the person selling deals in ceramics.
I would hate to buy all of it and not be able to use it. Thank you so much for your help
Hi Michelle. To my knowledge, ceramic glaze and furniture glaze are two different things. The furniture glazes I like are waterbased. Ceramic glazes are usually made from silica and minerals.
Thanks for your tips
Excellent tips! You are right about applying glaze, it does not come naturally to everybody and it involves lots of practice to master it but once done help save lots of money and you get an additional hobby.
Hi,
I’m in a bind and I’m gonna ask for help.
I did a wooden ceiling for a patio, the glaze I used is called Glaze& Seal Wet Look Green concrete & masonery Laquer..
Now the problem is that some areas are flaky what do I do to have it blend in without looking spotty and dried up?
I tried water, acetone ammonia purple power cleaner nothing seems to clean it up 100% without removing the glaze itself or making it look more spotty and flaky when dry.
What do you recommend help
Hi there! I looked up the product you mentioned and I don’t believe it’s meant for wood. You’ll probably want to sand it down and seal it with a water-resistant, outdoor deck sealer. Good luck with your project!
I want to use Benjamin Moore Advance to get the color I want, then use General Finishes glaze on that. Will that work? And I have GF Flat-out Flat—will that work as the sealant before the glaze? With Advance, do I need that sealant layer? (I know I need to topcoat after the glaze.)
Hi Gena! Thanks for stopping by! So, I love BM Advance for pieces that I want a clean, modern look for. Because it is a cabinet paint that dries hard, I generally don’t use a sealer on it, I just follow dry time instructions to the letter and then keep some for touch ups. It is an alkyd paint so covering it with poly might make it crackle or craze. Your best bet would be to ask the guys at your local Ben Moore dealer what they would suggest. I’d hate to tell you what I’d do and then have all your hard work be ruined!
Hi! What sealer do you recommend after glaze has dried and how long should I wait for it to dry/cure before sealing? I need the most durable and water proof/resistent sealer possible as it is for the top of my bathroom vanity! Thanks so much! Love your work!
Hmmm, that’s a different beast. My favorite topcoat is linked in the post, listed under Supplies. Click on top coat and it’ll take you to General Finishes High Performance. I LOVE that stuff. That being said, I don’t think they would recommend using it on a vanity top. You could try their Arm R Seal or a marine varnish? If I were you, I’d go to your local paint store and asked what they would suggest for that specific application. They might have something perfect for it! As for dry time, I’m a stickler for following manufacturers directions on the can. So, when in doubt do that. Thanks for stopping by! Good luck with your project.
Hi Missy,
Many thanks for this very valuable & detailed information on glazing. I have a quick question: do you top coat prior to glazing your piece of furniture as well as after glazing? Also, are you able to sand after glazing if you get some uneven glazing spots?
Hey there! Yes, I do a shellac or top coat on the piece before and after glazing. If you want to check out the first bullet point under Tips & Tricks in the post, it’ll explain why I add that extra step before. As for your second question, I apply in small sections and wipe off as I go. You could try sanding after but it might change the look, soften things. I’ve never done it that way, but give it a shot on a scrap board and see what happens. Good luck!
Thanks so much for your really informative post! I’m working on a coffee table and using BM paint and Rustoleum’s Decorative Glaze to create a a faux wood grain effect, what some call the Pottery Barn or Restoration Hardware finish (thanks to YouTuber Black Sheep House’s excellent tutorial!). It creates a very different effect (more along the lines of Organic Modern style rather than the beautiful Traditional/Antique work you create).
I have one question and one fyi comment:
1. I found your blog because I was searching for a way to thin out Rustoleum’s Java Brown glaze—have you ever tried thinning this product? I’m going to give it a shot today, using water. Fortunately I have some wood to practice trying this out on, but you seemed knowledgeable about glazes so I was hoping for any additional tips/tricks you didn’t include regarding working with thinned glaze. Does the work and/or dry time change? Any issues sealing it with a water-based poly afterward (I have the GF High Performance Topcoat, the water-based poly).
2. This is my first time working with a glaze, so I have no basis for comparison, but I think Rustoleum’s glazes (or maybe it’s just the Java Brown color, though that would be weird) have a longer work time before they start to get tacky and dry down. I haven’t really had any issue with work time, which also surprised guy who helped me at the paint store (notably, I didn’t purchase the Rustoleum product there). Maybe it’s because we’re creating such different effects, so I don’t need to wipe of as much product, and therefore don’t notice it drying? Anyway, just thought you might find that fact interesting since this is your schtick!
Thanks again for the post, hope to hear your thoughts on all of this (sorry the comment is so long!)
Hey there! I have never used Rustoleum’s glaze so I’m afraid I can’t really help you there. I’m sorry! In my experience, glazes don’t have a very long work time but maybe I’m doing it in a weird way? You never know with me! I’m kind of a trial and error kind of gal! I just looked up the Rustoleum glaze and it says it has good workability, so that’s cool! I’ve never thinned a glaze and on Rustoleum’s fact sheet is says thinning is not necessary, so I really don’t know there. Anyway, sounds like a fun product! Good luck on your project! Have fun!
Hi. I have someone replicating a cupboard from the 1930s. the paint is a pale whitish yellow. I’m trying yo create a white that has yellowed to it looks like a pale ivory. I hate a flat color look. I want it to look authenticly old. what kind of paint and glaze would I use? I’m thinking the paint on the original was oil based? not sure what was used in the 30s. thank you
Ooh, that’s a good question. The easiest route would be to color match your cupboard at a paint store. It probably wont be exact, but it will be close. I’d go with a paint specific for cabinets/furniture, and then you can choose the sheen like eggshell or satin. I like Benjamin Moore or Sherwin Williams cabinet paints. If you want to go the furniture paint way, you could try to match a color from your favorite furniture paint company. Or try a white with a brown glaze on top. Glaze can be super finicky though, so there is no guarantee you’d get a color match. I’d start super light on the glaze and wipe off a lot, adding more over time if you like the direction its going. Good luck!
Hi Missy, I have an antique dresser that has been painted several times. The paint has the most beautiful crackle that I hope to preserve, enhance and protect. Do you have any suggestions for the best way to accomplish this? Will glaze go into the crackle? (which is what I would like)
Hello there! Sorry for the late reply, I’ve been dealing with some health issues. I hope your antique dresser turned out lovely. I would guess that the glaze would enhance the crackle. Just don’t apply to thickly and wipe most of it back off. Good luck!
I painted a laminate nightstand using Valspar cabinet paint. The nightstand is very detailed with carvings and cut-outs. The color I chose is light grey, however, I’m not happy with the shade and I want to try to darken it with glaze. I haven’t applied a top coat and I don’t think it is necessary with the Valspar cabinet paint. I’m new at this and would appreciate any advice or recommendations.
Sorry this reply is so late, I’ve been dealing with health issues. I hope your nightstand turned out well! Sometimes I find that applying a top coat helps the glaze smooth out a little better. But a lot of furniture techniques are honestly just trial and error. I hope it went well over your cabinet paint! Wishing you the best!
This is seriously so helpful and I’m so glad I found your post before I started putting glaze on some chairs that I have. They have so much small and intricate decoration on them that I’ve been really worried about it looking clunky. I feel so much more confident now. Thanks so much for sharing!