Homemade vanilla
Welcome to my happy place of DIY, homemade, homegrown, handmade, nourished & crafted, whole hearted living. Finding magic in the mundane & growing some roots in the process.
This post may contain affiliate links. If you click on a link and purchase an item, I will receive a small commission. For more info, please see my disclosure on my Connect page.
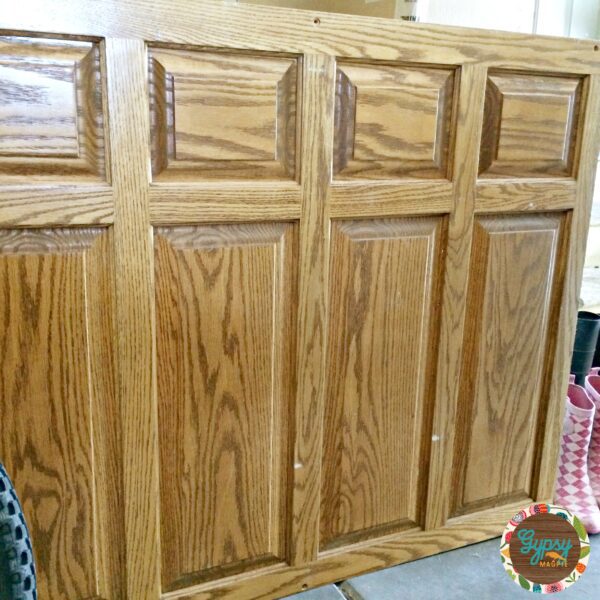
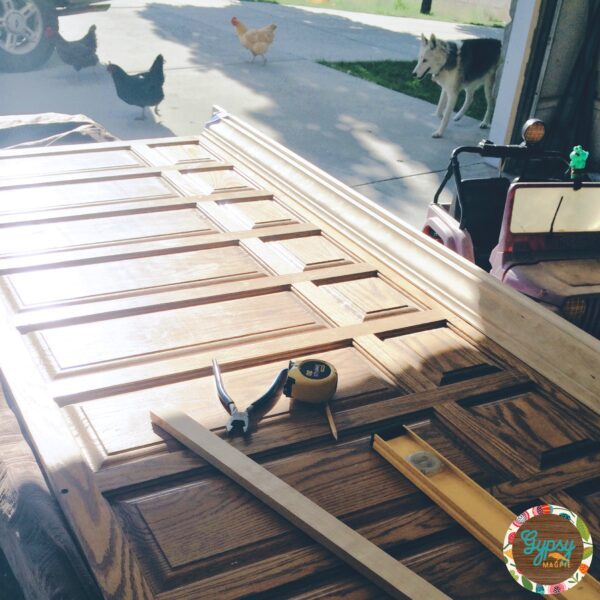
Last summer, I found a vintage wall panel at a yard sale and couldn’t walk away from it. The man selling it was involved in the remodel of a courthouse out in the Uintah Basin. The paneling had been handmade by a little old man decades ago and the contractor recognized the craftsmanship and couldn’t throw it away.
Yard Sale Treasure
He had plans for using most of it, but didn’t need this long piece so he decided to try selling it at his wife’s yard sale. That sweet man sold it to me for $5.00. I threw my money at him, loaded the panel in the back of my SUV, and drove off as fast as I could go before he second guessed himself!
I love that the contractor saved this beautiful wood from certain destruction. It always feels good when I find a kindred spirit who sees the beauty in the old and honors it’s story. Hopefully I have honored it’s story, also.
The pressed wood bed my grandparents had given us years ago was being held together with lots of screws and pin-nails and we knew we were going to need to invest in a new bed, which gave me an idea. This giant panel was the perfect size for a headboard for our Cal-King mattress. Sadly, that thought sat in the back of my brain and this panel collected dust in the garage for a very, very long time.
What can I say, I have big dreams but only 2 hands and 24 hours in a day.
Facebook Marketplace for the Win
Our bed was falling apart more each week, and my parents knew I wanted to repurpose this panel, so they gave me a metal Hollywood frame for Christmas. On a whim one afternoon I posted our big pressed wood Cal-King bed frame on a yard sale site and sold it in an hour for $40. Since we had no frame now, we set up my Christmas present and called it good for the time being.
I slowly worked here and there on the headboard over the next few months. I am embarrassed to admit that it took that long, but there was just always more important things demanding my attention.
Crown Molding
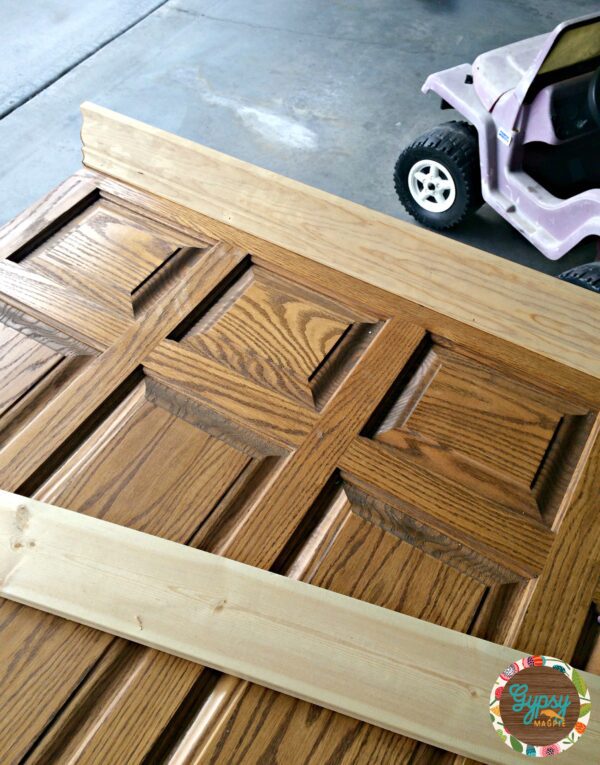
One day when my hubby wasn’t trucking, he helped me cut the crown molding to go across the top. I’ve said this before and I’ll say it again, crown is my nemesis. Angles? Math? Yeah, no thanks. One day we’ll buy ourselves a decent saw and that should make it a little easier, but it’s not on the top of the need list at the moment so we’ll keep plugging along with our cheap Harbor Freight POS.
But back to the story, we attached the crown molding with our pin nailer.
Done is Better than Perfect
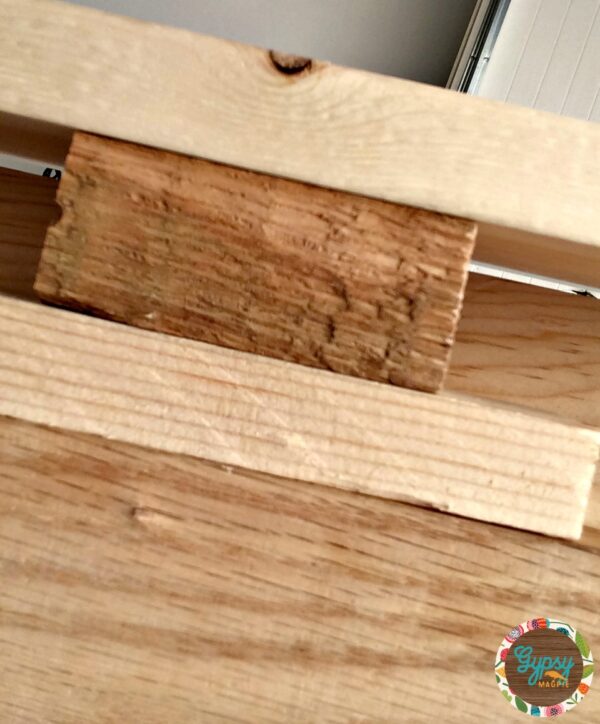
After the crown was on, I grabbed a 1x4x8 and adhered it to the top of the crown. This was a little tricky because I didn’t want to just slap glue on it and call it done. I cut scraps of wood and then stacked and nailed them on top of each other to fill the gap between the top of the panel and the crown.
This gave me a good base to nail the finish piece to the top of the crown.
It’s not perfect, but done is sure better than perfect.
Once I got the top board adhered, I caulked and filled all the gaps and let it dry.
Have I ever mentioned that I need a barn with a little workshop on the side? Well, I do so if somebody can please kindly tell my HOA that it’s cruel and unusual punishment to work in a garage filled with kids, kid toys, chickens, and a granny dog, I’d be so grateful. After all, somebody could get hurt!
For the love of the chickens, and my sanity, they should let me build a barn.
Milk Paint
I’ve been trying out a lot of different paints lately to get a feel for what is out there and what I like and don’t like. I had bought a bag of Sweet Pickins Milk Paint in Flour Sack so I figured why not give it a try. I love Old Fashioned Milk Paint and they make Sweet Pickins, so chances were I’d like it, and I did.
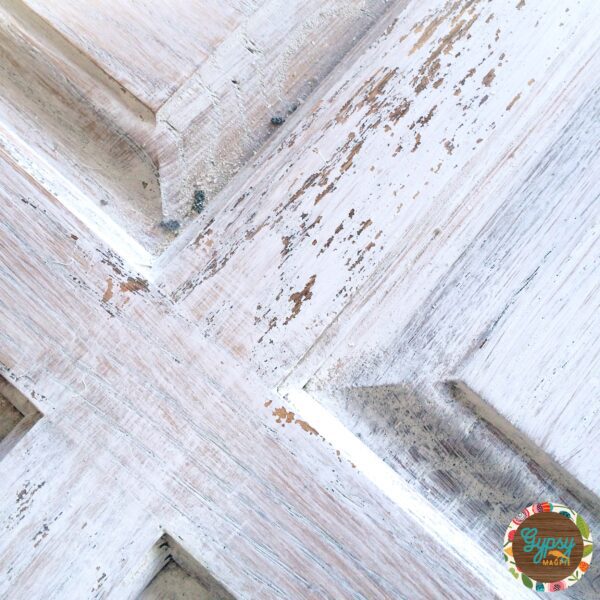
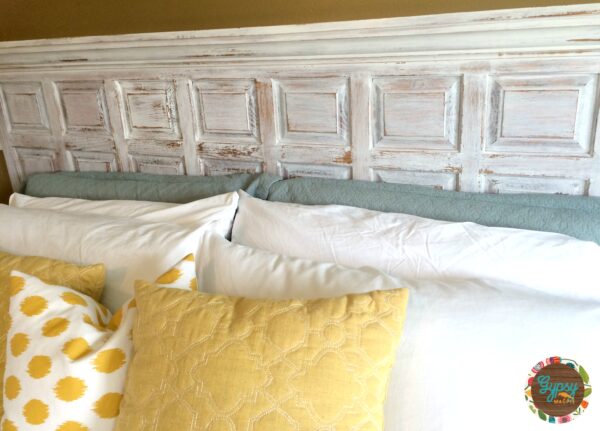
Milk paint is a lot of fun. I love how it chips and gives a piece that old, loved, traveled, collected look.
I didn’t add any extra bond for this piece because I was going for a rustic farmhouse style. After I painted my second coat of paint and let it dry, I went at it with sandpaper and a little paint scraper to get the big chips and distressing I was after. It’s a fun, creative part of the process that I definitely enjoy.
After it looked the way I wanted, I vacuumed up the dirt and wiped it down with a tack cloth.
Then, I waxed it with a clear wax and buffed it to a nice soft sheen.
French Cleat
Since it’s a large piece and I didn’t want to put screws through it, I decided to hang it with a french cleat, well actually two french cleats for good measure. This is a heavy hunk of wood!
I bought the french cleats at the big box store for around $15 each. I know it feels pricey, but it makes it so easy to hang and when I get around to painting that ugly wall, it’ll be a snap to pull the headboard off to paint behind it.
That makes it was well worth it to me.
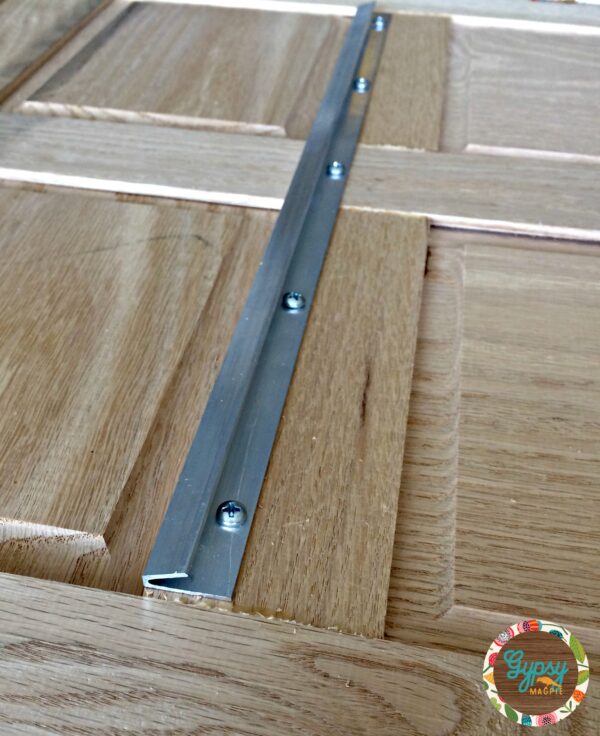
This is the part of the cleat that goes on the back of the headboard or large item you want to hang. Just drill little pilot holes for the cleat screws and then use a Phillips screw driver to attach the cleat to the wood.
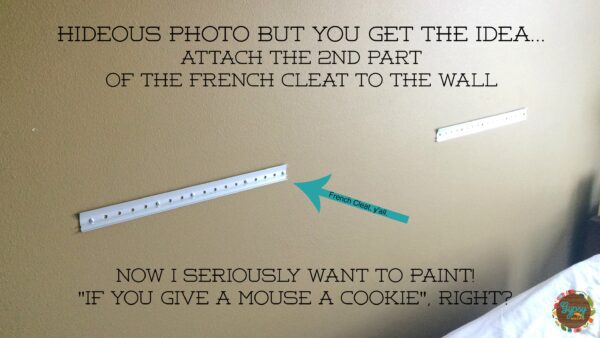
Next, you’ll measure and attach the second piece of the cleat to your wall. The cleats come with special screws so you don’t have to find a stud. The cleats spreads the weight of the object out across a large surface which makes it easy to hang a large item without ripping the drywall. Again, just use a Phillips screw driver to mount the cleat to the wall. If you use a power drill you risk spinning the screw and putting a hole in your dry wall.
I promise, it’ll go faster than you think.
I swear my bedroom wall color isn’t that ugly in person, but man it does NOT photograph well. Wow, that sounds oddly familiar. Same goes for me! Ha!
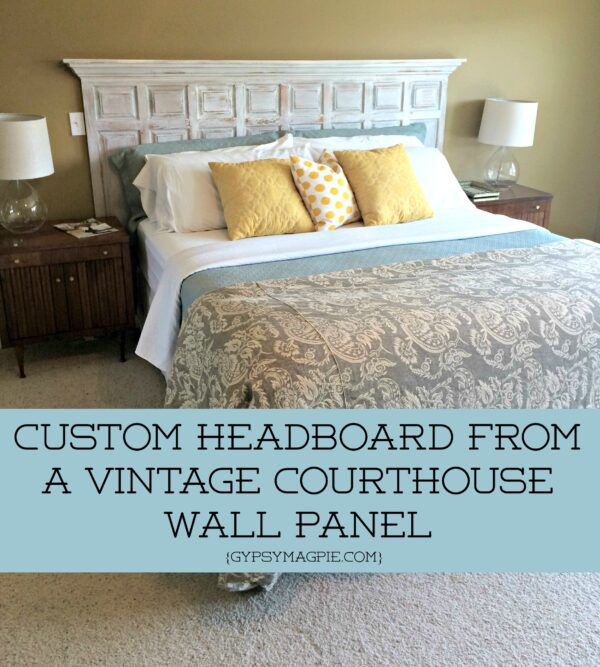
After
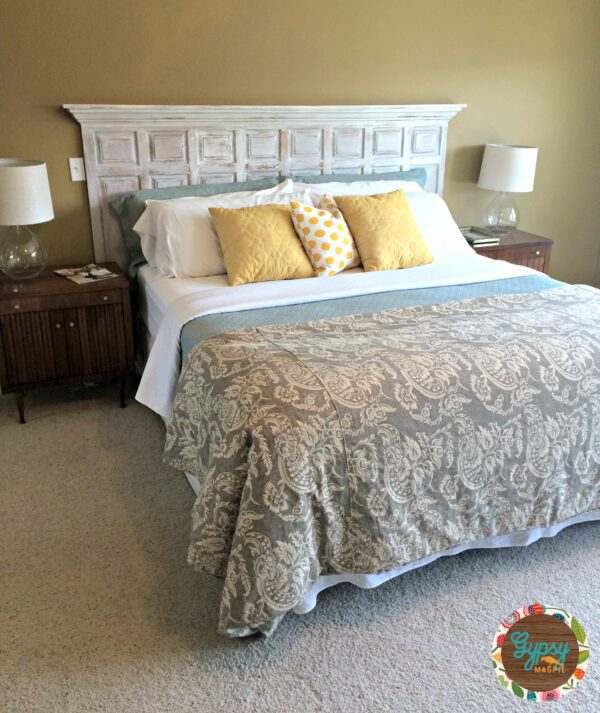
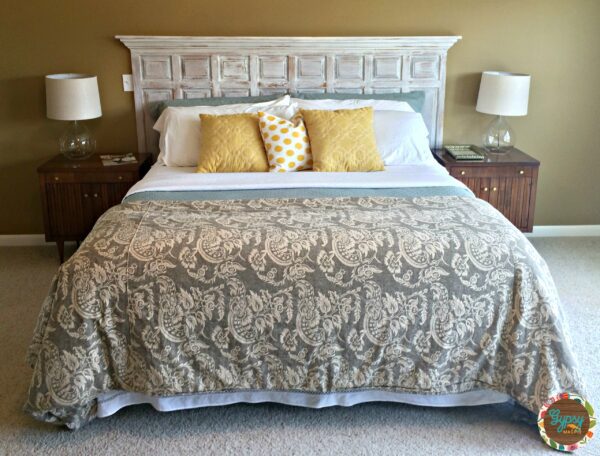
Once the cleats were on the wall, we hung the headboard, shoved the bed into position, and wondered why it took so dang long to finish this gorgeous piece.
I’m so happy with how it turned out and my husband is pretty much ecstatic to have it out of the garage.
Now I just need to sell those midcentury modern nightstands, find some I like better, paint the walls, hang some art, build a bench for the foot of the bed… like I said, “If you give a mouse a cookie.”
Make a girl feel better and tell me, have you ever had a year long project that should have taken you a few days?
